Personalize funny videos and birthday eCards at JibJab!

Monday, October 31, 2011
Wednesday, October 26, 2011
A Day of Pondering
So, for a while now, Derek and I have been "talking." It's been a roller coaster of a week this week though, especially when it comes to emotions. There has been tears, there has been anger, there has been joy, there has been disappointment, but most of all there has been a lot of fear.
I talk about having baby fever pretty often. I like the idea of having two kids, another big pregnant belly, all the happy times that come with pregnancy and a growing family. But at the same time I also have to think about everything it takes to have the baby, the bills from the hospital, the dr visits, the baby sitter cost, the diapers, the clothes, the formula (if you don't breast feed), the bottles, the tough nights, the lack of sleep, the fighting from being tired. But one thing that I think I would have to give up on for a little while is....school.
As of right now I'm considered a junior in college. I've been in school for 6 years now and I'm barely seeing the end of the tunnel. I would love to be able to quit my job and go back to school full time but I just don't see that happening. Even if I did go back to school full time I wouldn't see Stratton or Derek as much as I do now. Not to mention I still have a few years of school left before I can get all my classes finished. Derek won't give me a few years to wait to have another baby. Derek wants our children to only be a few years apart (when he does actually agree to have 2 kids) and Stratton is 3. The closest I can shoot for at least is 4 years apart.
So, the trouble I have now is making a decision. A very very hard decision. Which if I know my mother she will be the first to answer this for me.
Option 1: Quit school, make my family bigger and work full time, finish school later.
Option 2: Keep going to school, work part time, and make my family bigger.
Option 3: Keep going to school, work full time, make my family bigger.
Option 4: Go to school part time, work full time, no growth in family.
Option 5: Go to school full time, work part time, no growth in family.
Any of the options are going to be hard either mentally, financially, emotionally, or physically. Option 4 seems to be the road I'm on right now and I'm ready for a fork. I have got to move onto the next stage in my life whatever it may be.
Friday, October 21, 2011
Friday Confessions
I confess I went out last night...with some of my professors. It was kind of cool and kind of weird all at the same time. They're actually really cool people outside of class.
I confess I have truly forgotten how much my life used to revolve around art and how far I've strayed from that lifestyle. I'm thinking it is about time to start getting back into the passion I once adored more often.
I confess I feel like I got run over by a Mac truck this morning. Haha. I am so not used to this whole going out and staying up late thing anymore.
I confess it's depressing only getting like 20 minuets of sunlight a day. I hate getting off work when it's already dark.
I confess I am STILL loving my Erin Condren planner that I finally got in the mail last week. :)

I confess I have been on a roll lately with my homework and keeping up with classes. It really makes me question why students younger than me don't get their work done. Oh wait...I remember now. It's called beer.
I confess I bought a new scarf the other day and it's simply amazing. Keep your eyes peeled next week for a post ALL ABOUT IT! You're seriously going to run to Bloom Studio and Gifts to get one.
I confess I am going to STL for the weekend and I can not wait to get out of town!
I hope you all have a wonderful weekend!
Wednesday, October 19, 2011
My Makeup Collection
I'm not a girly girl. So, for me to wear makeup and/or do my hair is a big deal especially because 1. I'm not a morning person 2. I have a 3 year old and 3. I am NOT a morning person. These things pretty well keep me from looking like the average 25 year old who actually looks in the mirror before going to work. That being said, I've been working hard to not only get up earlier and do my makeup but I've been doing my hair and actually picking out cute outfits everyday. GASP! I know I should have been doing this a LONG time ago but for me I have to look at it as better late than never right? SO, as of lately I've been trying to increase my makeup collection piece by piece. Here is what I have to date.

Tip: Make sure there is a lot of liquid eyeliner on the foam brush before applying because you won't get an even line if you don't.
Tip: If it seems a little dry while putting it on, dip the end in a tiny drop of water to get it moist again. Then it should be good to go.
Tip: When applying this mascara instead of just going from base of eyelash to tip of eyelash with one swipe, wiggle the brush as you pull it away from your eye. It puts more on your lashes and encases the lash in the mascara.
Tip: Always always always put two to three coats of this on. Put the first one on, let it dry, and repeat.
Tip: Just like Too Faced Lash Injection Mascara, wiggle the brush as you pull it away from your eye so it puts more mascara on your lashes and encases the lash.
Tip: Use the applicator and put the primer on your entire eyelid. Don't worry about getting every single inch of you eyelid covered just make sure there is enough on your eye that you can smooth it out with your finger or a concealer brush. Make sure to get it bumped up to your top lashes. If you choose to put some on your lower lid be sure to use the nude primer and not this primer.
Tip: When applying this mascara tilt your chin down and look up into the mirror. This causes your lashes to move up from the skin below your eye and you're less likely to get mascara below your eyes. Another tip for lower lash mascara application is to put some loose powder under your eyes. It make it easier to wipe off if you do get any on your skin.
Tip: I always use two or three applications of this mascara when I put it on. It gives you the length that you want but not the nasty spider leg looking clumps.
I like to use this clear eye primer when I do any other color than brown or gold. It holds the makeup on your eye all day without that weird crease that you sometimes get with cream eyeshadow. Not to mention when using eye primers they make the color of your eyeshadow bolder and brighter.
Tip: Use the applicator and put the primer on your entire eyelid. Don't worry about getting every single inch of you eyelid covered just make sure there is enough on your eye that you can smooth it out with your finger or a concealer brush. Make sure to get it bumped up to your top lashes. If you choose to put some on your lower lid be sure to use the this primer and not shimmery primer.
Tip: Use this as often as you feel like you need it.
Tip: Put this on before applying lipstick and it will mix with the lipstick and keep your lips from drying out.
 This is by far my favorite color lipstick. I love that when you put it on it really does make your lips look like a red foil. It's so pretty. Kat Von D really does make some of the best makeup products out there that are reasonably priced.
Tip: Top off this beautiful color with a little bit of lip gloss to keep it fresh looking and your lips moisturized. (She makes a clear gloss too!)
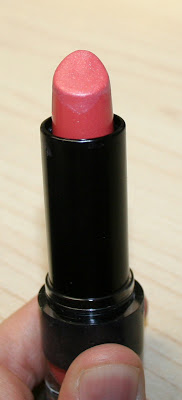 I love this color for not-so-dramatic lips. I usually tend to pair this lipstick with a natural eye color palette. It's perfect for everyday use because it's not bright red like the Beranice but is just enough color to look classy.
Tip: Put a little bit of chap-stick on before applying and it will make your lips stay moisturized.
 This is such a fun color if you really want to go bold. It is a RED red lipstick that goes on really super smooth. I have the underage red lip gloss as well that really makes this color POP! I like to wear this with dramatic silver eyes and a simple outfit.
Tip: Use the underage red lip gloss over it because it doesn't tone the red down like a clear gloss would or a chap stick would.
Tip: Invest in some Burt's Bees shares because I will forever buy this brand of chapstick until they go out of business and stop selling it.

I have to admit...this was the first ever lipstick that I have EVER bought...and I got it like 6 months ago. I went for something that was not TOO over the top and this was what I decided on. It's perfect too for everyday use because it's not very bold and it matches my light skin tone. I love wearing it with a dark eye color or even a light eye color. It works with everything.
Tip: Put some chapstick on before you put this one on and mix the two so that the color is still bold and your lips stay hydrated.
Tip: Apply in a dabbing motion instead of a wiping motion when putting over lipstick. This keeps your lipstick in place and makes it so you don't have to apply more later.
 This is almost the exact same color as the Aerie Soft Gloss Lip
Gloss. I use it just like it too. It's a soft pink color with a little
bit of a sweet flavor to it.
This is almost the exact same color as the Aerie Soft Gloss Lip
Gloss. I use it just like it too. It's a soft pink color with a little
bit of a sweet flavor to it.
Tip: Use it just like the Aerie Soft Glass Lip Gloss dab on instead of swiping.
Tip: I like to pat this brush on my trouble area instead of swiping it across the area. I lay it flat on it's side and make sure there is enough power on the brush. Once I have enough on there I use my Sephora Airbrush Concealer Brush to smooth it out and give it an airbrushed look to it.
Tip: Use more eyeshadow than what you think you will need. After you smudge it it won't be as dark.
Put on a little more than what you think the "right" color should be and then smudge it down to the preferred color.
Tip: Swirl the brush in the powder foundation and tap the excess power then go to town. You can't really mess up while using this brush. Just make sure you put it on evenly throughout your face.
Tip: You can't really go wrong with this brush when you use it for applying Mineral Veil just make sure you put it all over your face evenly.
Tip: Make sure you wipe off your brush in between colors. If you use a dark color right before you use a light color you will have that dark color still mixed in with your brush and you might not want that.
Tip: Clean this brush regularly. Clean all your brushes regularly but make sure that you really clean this one good. You tend to use this brush on zits or pimples and black heads so this brush is absorbing all those nasty germs that are in those areas. Make sure you rinse your brush or spritz it with alcohol to clean and sanitize against those nasty germs.
Tip: Put a very small amount of bronzer in the brush before applying it to your face. It's better to start of really light and go darker than it is to get too much in your bush and have to wipe it off and waste product.
Tip: I recommend washing this brush monthly. It is a thick brush so it holds a lot of product. Use the bareMinerals brush wash and dry it flat or standing up on the wooden end and let dry overnight. As far as putting product on, make sure you start off with a small amount of bronzer and work more onto your skin. Don't start with a huge pile of bronzer and work it into your brush and try to apply. You will waste product and wind up looking straight out of the 80's
Tip: You really can't go wrong when using this brush to put on foundation. I love that you can just load up your brush and go at it. It's super easy and definitely dummy friendly. If you like your makeup to stay on longer use bareMinerals Prime Time before applying your powder foundation and it will last MUCH longer.
 This bronzer has been my best friend since I realized I can use
another color other than PINK on my cheeks to add some color to my ivory
skin. This is just the right shade of brown that it doesn't look
unnatural like some of the other bronzers out there on the market. I
like to use a tiny bit on the cherries of my cheeks and a whatever is
left over I like to use on my forehead.
This bronzer has been my best friend since I realized I can use
another color other than PINK on my cheeks to add some color to my ivory
skin. This is just the right shade of brown that it doesn't look
unnatural like some of the other bronzers out there on the market. I
like to use a tiny bit on the cherries of my cheeks and a whatever is
left over I like to use on my forehead.
Tip: Start off with a small amount of powder in the lid of your container and swirl your brush into the product. Tap your brush on the side of the lid with the bristles over the lid to get off any excess powder then swirl the brush on your cheeks and forehead wherever you are wanting that warm glow.

Fairly light is the color that I use for my foundation in the summer time. It's got more of a yellowish tint to it so using it in the summer with your pink cheeks will make you look a little darker than what you really are. I don't use this in the winter because my skin does not hold sun very well. I like this foundation a lot. This too was the first color of mineral powder that I ever bough in high school.
Tip: Make sure you try different colors before you settle on just one. You can even mix some of the shades of foundation powder together if you can't find the one that is just right for you. Start off with a small amount of powder in the lid of your container and swirl your brush into the product. Tap your brush on the side of the lid with the bristles over the lid to get off any excess powder then swirl the brush on your face wherever you are wanting coverage.
Tip: I like to use a foundation brush to put on my liquid concealer. Not the same brush that I use for my powder concealer of course. But putting it on with a brush is better looking not to mention you don't get the oils from your fingers on your face that cause MORE ZITS!
I was kind of skeptical about the Matte part of this foundation. I like to have a little bit of sparkle to my cheeks. Once I actually started using it I fell in love with it. The coverage is a little better than the Original Foundation. I like to use the Full Flawless Bush with this because it goes on so much smoother for all over coverage. For the smaller areas I like to use the Sephora Airbrush Concealer Brush.
Tip: Just like the other bareMinerals powder foundation, make sure you try all their different colors before you settle on just one. Also, start off with a small amount of powder in the lid of your container and swirl your brush into the product. Tap your brush on the side of the lid with the bristles over the lid to get off any excess powder then swirl the brush on your face wherever you are wanting coverage.

I can't say enough good things about this bronzer. The only down side....they don't sell it individually. You have buy the Facial Wash and Lotion set to get this bronzer and I'm not sure that they sell the kit anymore. I'm really sad that that's the only way you can get this bronzer because I seriously love it. It has a little bit of sparkle to it so it gives you a little bit extra glow.
Tip: Use the bareMinerals Feather Light Brush when putting this bronzer on. You don't need a whole lot so the Feather Light is perfect for application. When applying, again, start off with a small amount of powder in the lid of your container and swirl your brush into the product. Tap your brush on the side of the lid with the bristles over the lid to get off any excess powder then swirl the brush on your face wherever you are wanting coverage.
 I like this blush but I wouldn't go so far as to say that I love it. It's convenient design was initially got me hooked to this product. The makeup for the blush is actually tucked up in the top of the lid so when you twist the brush up into it the blush goes onto the brush. I'm not a huge fan of the brush because I don't think it's large enough for blush but that's just me. I like the color of this blush though. It's a really pretty color pink that you can easily smooth into your skin.
Tip: I would recommend using the brush included to get the blush from the lid to your face but I would suggest using a blush brush or the bareMinerals Flawless Face Brush to blend it into your cheeks.
 This by far is my absolute favorite eye makeup. I have a huge girl crush on Kat Von D in the first place but her makeup line is actually full of some really great quality products. The colors are from left to right:
Lucifer- black,
Orbi- dark olive green,
Dimebag- electric green,
Tequila- yellow,
Clay-light tan with gold sparkles,
Downtown- light sparkly gold/brown,
Baroque-darker shiny brown,
Leather-flat dark brown.
This is my one of my favorite pallettes of hers. The colors are just like what I use on a daily basis.
Tip: Blend, blend, blend. The best way to make your eye makeup look good is to make sure you blend your colors. Pick colors that you like, not what match your clothes. Most of all, have fun when you're putting on your makeup. It makes you feel better as the end result.
 This was the second pallette of eye makeup that I got form Kat's eye makeup line. The colors are a little bolder and it took me a little bit to get used to putting on the different colors. This pallette was my first experience with cream eyeshadow. I'm still learning how to apply it without getting those weird crease marks. The colors are from left to right:
Peanut- light gold
Benji (cream)- gold
Rebekah- brown with gold glitter
Lucifer- black
Cholita- dark plum
Skiba- medium purple with silver glitter
Babe- iridescent purple
Missy- white with iridescent purple
This was the first pallette that I got that made me really have to think outside of my comfort zone to apply them.
Tip: Practice putting on makeup as much as you can. Keep trying to do different things and see what works and what doesn't work. Also, invest in some cotton cloths and eye makeup remover because you'll need it.
 This is the pallette that has scared me to use. Haha. I've been dabbling into it's purple colors but I haven't even tried the greens yet. I'm nervous they'll make me look ... weird. But, part of getting makeup is trying it out and seeing if you like it. If you happen to not like it, save it for Halloween! I'm eventually going to have to break down and try the greens out. The colors in this pallette are from left to right:
Sugar Skull- white with iridescent green
Long Distance-metallic green with gold sparkles
Snake Eyes- light green
Finland (cream)- teal cream
Prague- dark purple
Galeano- sparkly purple
Rehab- metallic pink
Sister- light pink
I like using the purple colors in this pallette. They blend really smooth and they look really great together.
Tip: Don't be a chicken like me, bust into that green color and rock it!

This little duo is great for if you don't want to go all out with your makeup. I like to use it as just a little extra color on my eyelids for when I don't want to put a bunch of time or effort into my makeup. I like these colors because they are great for allover color.
Tip: use a foam tip eyeshadow brush to apply and then use a smudge brush to blend around the edges.
Tip: Use the foam brush that is attached to the lid to apply it on your eyelid, then use a eyeshadow brush to blend it in with the surrounding eyeshadow.

Tip: Just like the Moonshine color apply with the the foam brush that is attached to the lid to apply it on your eyelid, then use a eyeshadow brush to blend it in with the surrounding eyeshadow.
 This was the first bareMinerals powder eyeshadow I ever bought. This was back when I only used one color for eyeshadow and knew absolutely nothing about blending or using more than one color. The color is really like and very metallic. I like to use it on my inner eye and right below my eyebrows. It looks really good over the Urban Decay Eye Primer Potion with the gold in it.
Tip: Use a very loose brush when applying the powder makeup. Also put some extra foundation under your eyes so if you drop any below your eye it easily wipes off.

I love this color! I like to use this color in the middle of my eye between a really dark color on the outside of my eye and a really light color on the inside of my eye. It's a great blending color because it's so sparkly you can get some over either side and it looks sparkly and nice.
Tip: I like to apply this with my Mary Kay Eye Definer & Eye Crease Brush the bristles of the brush are light and loose so you can apply it easy and blend really well too.
 I like to use this color with the browns and golds that I usually wear. I like to use it over a black color or a dark brown color because it's dark but has the gold shimmer to it that makes it really pop even when the color is super dark.
Tip: Like the other bareMinerals eye colors. I like to use the Mary Kay brush to apply it. I use the crease side to use it on the crease of my eye. It is a great way to give your eye some depth.
Tip: Use the Mary Kay brush and go for it!

1. Sephora Liquid Eyeliner
I love this eyeliner...sometimes. Like every other eye makeup each one has it's place and time. This eyeliner is no different. I use it for a thicker/bolder line above my top eyelashes to get a thick line.Tip: Make sure there is a lot of liquid eyeliner on the foam brush before applying because you won't get an even line if you don't.
2. Kat Von D Tattoo Eyeliner color: Trooper
This eyeliner I will have to say is my favorite eyeliner to date. It's super easy to put on. You shake it before you open it and it's good to go. The tip is really fine so it's easy to make really pretty cat eyes at the corners of your eyes. They don't look so Amy Winehouse but soft and pretty. Love this liner!Tip: If it seems a little dry while putting it on, dip the end in a tiny drop of water to get it moist again. Then it should be good to go.
3. Too Faced Lash Injection Mascara
This was the first "high quality" mascara I ever bought...5 years ago. I still use it to this day if that tells you how much I like it. It's a great mascara to get thick full eyelashes. Not to mention they give you a lot of length!Tip: When applying this mascara instead of just going from base of eyelash to tip of eyelash with one swipe, wiggle the brush as you pull it away from your eye. It puts more on your lashes and encases the lash in the mascara.
4. Maybelline One by One Volum Express Mascara
I like to use this mascara when I don't want very dramatic looking eyes for the day. I use this on days that my makeup is more light and natural looking. It gives you A LOT of length but not a lot of volume. Hence the name One by One.Tip: Always always always put two to three coats of this on. Put the first one on, let it dry, and repeat.
5. Maybelline The Colossal Volum Express Mascara
-This mascara is really great if you want really thick lashes. I like to use this on top of #3 the Too Faced Lash Injection Mascara. It's very dramatic and beautiful paired with a thick black eyeliner and a natural palette of eye colors.Tip: Just like Too Faced Lash Injection Mascara, wiggle the brush as you pull it away from your eye so it puts more mascara on your lashes and encases the lash.
6. Urban Decay Eyeshadow Primer Potion color:Sin
This is one of the few eye primers that I use. I like to use this colored eye primer when I do a brown/gold palette on my eyes. It gives it a slight glimmer when putting it on and it holds my eyeshadow on all day long. Not to mention when using eye primers they make the color of your eyeshadow bolder and brighter.Tip: Use the applicator and put the primer on your entire eyelid. Don't worry about getting every single inch of you eyelid covered just make sure there is enough on your eye that you can smooth it out with your finger or a concealer brush. Make sure to get it bumped up to your top lashes. If you choose to put some on your lower lid be sure to use the nude primer and not this primer.
7. Cover Girl Lash Blast
-I have to admit that I only use this mascara for one reason and one reason only. To get mascara on my lower lashes. It's perfect for lower lashes thought! The bristles on the brush head are really short and further apart than regular bristles. It makes for the perfect brush because I'm not as worried about poking myself in the eye with it.Tip: When applying this mascara tilt your chin down and look up into the mirror. This causes your lashes to move up from the skin below your eye and you're less likely to get mascara below your eyes. Another tip for lower lash mascara application is to put some loose powder under your eyes. It make it easier to wipe off if you do get any on your skin.
8. Cover Girl Volume Exact
This mascara is great for long thin eyelashes. I have so many different mascaras but I really do use them all for different applications of makeup. I like this mascara if I just want to not put any makeup on for the day as far as eyeshadow. It's great to just make your lashes look naturally long and still make you look at least a little made up.Tip: I always use two or three applications of this mascara when I put it on. It gives you the length that you want but not the nasty spider leg looking clumps.
9. Urban Decay Eyeshadow Primer Potion
I like to use this clear eye primer when I do any other color than brown or gold. It holds the makeup on your eye all day without that weird crease that you sometimes get with cream eyeshadow. Not to mention when using eye primers they make the color of your eyeshadow bolder and brighter.
Tip: Use the applicator and put the primer on your entire eyelid. Don't worry about getting every single inch of you eyelid covered just make sure there is enough on your eye that you can smooth it out with your finger or a concealer brush. Make sure to get it bumped up to your top lashes. If you choose to put some on your lower lid be sure to use the this primer and not shimmery primer.
10. Garnier Nutritioniste Skin Renew Anti Puff Eye Roller
There are not enough words in the English language to describe how much I love this product. I roll it on under my eyes as soon as I wake up every morning. I do it after I wash my face and put on my face lotion (with SPF 15 in it). I just roll it on and it makes my eyes instantly feel less sleepy. I love this because they also make it with some color in it for those dark circle. I tend to like this clear version better because the color doesn't match my skin and winds up making me look like I have dark skin under my eyes anyway. Tip: Use this as often as you feel like you need it.
11. EOS Chap-stick
This is one of the best tasting chap-sticks I have found in a while. It was from Wal-Mart and was fairly inexpensive. I like it because it tastes good and it's really easy to apply. It doesn't go on super thick which is nice too.Tip: Put this on before applying lipstick and it will mix with the lipstick and keep your lips from drying out.
12. Kat Von D Foiled Lipstick color: Beranice

Tip: Top off this beautiful color with a little bit of lip gloss to keep it fresh looking and your lips moisturized. (She makes a clear gloss too!)
13. Kat Von D Painted Love Lipstick color: Coral Castle

Tip: Put a little bit of chap-stick on before applying and it will make your lips stay moisturized.
14. Kat Von D Painted Love Lipstick color: Underage Red

Tip: Use the underage red lip gloss over it because it doesn't tone the red down like a clear gloss would or a chap stick would.
15. Burt's Bees Chapstick
I am in love with Burt's Bees. I love the way it makes your lips tingle and not to mention it's a little minty so if your breath is not as good as it should be just lick your lip and it helps a little. I use this year round because it is such a great chapstick.Tip: Invest in some Burt's Bees shares because I will forever buy this brand of chapstick until they go out of business and stop selling it.
16. Benefit Cosmetics Full Finish Lipstick color=Shy

I have to admit...this was the first ever lipstick that I have EVER bought...and I got it like 6 months ago. I went for something that was not TOO over the top and this was what I decided on. It's perfect too for everyday use because it's not very bold and it matches my light skin tone. I love wearing it with a dark eye color or even a light eye color. It works with everything.
Tip: Put some chapstick on before you put this one on and mix the two so that the color is still bold and your lips stay hydrated.
17.Aerie Soft Gloss Lip Gloss
I got this as a sample from America Eagle a long time ago and I just love it. It's tiny so if you have lipstick on and would like to keep it looking fresh without taking your whole makeup bag with you, you can tuck this in your pocket and use it throughout the night. It's perfect for the "Shy" color lipstick above. It goes over it very nicely and still looks so pretty.Tip: Apply in a dabbing motion instead of a wiping motion when putting over lipstick. This keeps your lipstick in place and makes it so you don't have to apply more later.
18. City Garden Lip Balm

Tip: Use it just like the Aerie Soft Glass Lip Gloss dab on instead of swiping.
19. Bare Escentuals Max Coverage Concealer Brush
This brush is perfect for those bigger areas that you need to put powder concealer on. I like to use this for under my eyes and on my chin. It's perfect for the larger areas that need a little extra TLC.Tip: I like to pat this brush on my trouble area instead of swiping it across the area. I lay it flat on it's side and make sure there is enough power on the brush. Once I have enough on there I use my Sephora Airbrush Concealer Brush to smooth it out and give it an airbrushed look to it.
20.Sephora Shadow and Smudge Brush
This little brush is awesome for eye shadows. I like to use the smaller brush to smudge my lower lid and give a smokey eye effect. I put a little black or dark brown eyeshadow right under my lower eyelashes and use this brush to smudge it and give it a more blended look.Tip: Use more eyeshadow than what you think you will need. After you smudge it it won't be as dark.
Put on a little more than what you think the "right" color should be and then smudge it down to the preferred color.
21. Sephora Airbrush Concealer Brush
I just recently purchased this brush from Sephora's Professional line of brushes. It it a little better quality bristles than the regular black handled brushes in the Sephora line. I love this brush because it is perfect for that "airbrushed" look. I use it all over my face even though it is such a small brush. I like to use it more heavily on my trouble areas like under my eyes and around my chin area.Tip: Swirl the brush in the powder foundation and tap the excess power then go to town. You can't really mess up while using this brush. Just make sure you put it on evenly throughout your face.
22. Clinique Blush Brush
I use this brush for one reason and one reason alone. To apply
bareMinerals Mineral Veil. It's PERFECT for it. It goes on really soft
and it doesn't mess up what you've already put on. I love this brush
because of how soft it is. It works awesome for bronzer too but I don't
use it for that reason.Tip: You can't really go wrong with this brush when you use it for applying Mineral Veil just make sure you put it all over your face evenly.
23. Mary Kay Eye Definer and Eye Crease Brush
I seriously use this brush ALL the time for my eye shadows. I use the eye definer to put on my all over shade and also get right into the corners of my eyes. I use the crease side for...well the crease of my eye.Tip: Make sure you wipe off your brush in between colors. If you use a dark color right before you use a light color you will have that dark color still mixed in with your brush and you might not want that.
24. Sephora Concealer Brush
This smaller concealer brush is great for those tiny areas that you need to get concealer on. I like to use if for the dark circles that I get under my eyes or smaller "tough areas." I like this brush because the bristles are soft and it makes the makeup go on a lot smoother.Tip: Clean this brush regularly. Clean all your brushes regularly but make sure that you really clean this one good. You tend to use this brush on zits or pimples and black heads so this brush is absorbing all those nasty germs that are in those areas. Make sure you rinse your brush or spritz it with alcohol to clean and sanitize against those nasty germs.
25. bareMinerals Feather Light Brush
I love this brush for putting on bronzer. Like the name says, it's feather light. It holds makeup really well so you don't have to use a lot of product to get that nice glow. I love that it is really soft because it's easy on your skin as well.Tip: Put a very small amount of bronzer in the brush before applying it to your face. It's better to start of really light and go darker than it is to get too much in your bush and have to wipe it off and waste product.
26.bareMinerals Flawless Face Brush
This brush is one that I first started using when I got bareMinerals for the first time. The name on the brush actually says Bare Escentuals which was their name before they switched to bareMinerals. Anyway, I love to use this brush for their bronzer. It holds just enough bronzer to get that nice summer glow but not too much where you need to wipe it off. It's super soft too which is nice for the face.Tip: I recommend washing this brush monthly. It is a thick brush so it holds a lot of product. Use the bareMinerals brush wash and dry it flat or standing up on the wooden end and let dry overnight. As far as putting product on, make sure you start off with a small amount of bronzer and work more onto your skin. Don't start with a huge pile of bronzer and work it into your brush and try to apply. You will waste product and wind up looking straight out of the 80's
27.Base Minerals Full Flawless Face Brush
This was my first ever makeup brush. I fell in love with bareMinerals (Escentuals) when I was in high school and this was the first "real" makeup that I had ever bought with my own hard earned money. Thirty dollars when you're in high school is a lot, especially when you weren't really a fan of putting on makeup in the first place. Anyway, this brush is super soft and just like it's cohort the Flawless Face Brush you have to wash it pretty often because of the buildup of product. Not to mention you rub it all over your face everyday. It's nice to get some of that gunk out of your brush. Again, use the bareMinerals brush shampoo on your brushes and rinse with water. Let dry over night and you're good to go the next day.Tip: You really can't go wrong when using this brush to put on foundation. I love that you can just load up your brush and go at it. It's super easy and definitely dummy friendly. If you like your makeup to stay on longer use bareMinerals Prime Time before applying your powder foundation and it will last MUCH longer.
28. bareMinerals Warmth Bronzer

Tip: Start off with a small amount of powder in the lid of your container and swirl your brush into the product. Tap your brush on the side of the lid with the bristles over the lid to get off any excess powder then swirl the brush on your cheeks and forehead wherever you are wanting that warm glow.
29. bareMinerals Fairly Light Original SPF 15 Foundation
The Fairly Light color is the one on the bottom. I wanted to put them next to each other so you all could see the difference in color. 
Fairly light is the color that I use for my foundation in the summer time. It's got more of a yellowish tint to it so using it in the summer with your pink cheeks will make you look a little darker than what you really are. I don't use this in the winter because my skin does not hold sun very well. I like this foundation a lot. This too was the first color of mineral powder that I ever bough in high school.
Tip: Make sure you try different colors before you settle on just one. You can even mix some of the shades of foundation powder together if you can't find the one that is just right for you. Start off with a small amount of powder in the lid of your container and swirl your brush into the product. Tap your brush on the side of the lid with the bristles over the lid to get off any excess powder then swirl the brush on your face wherever you are wanting coverage.
30. Mary Kay Ivory 200 Medium Coverage Concealer
I love this makeup for those stupid zits that pop up every month right before it's time for me to bless my husband with a nice case of PMS. I have this awful little red dot that has been on my nose since I was in high school that I absolutely HATE. This concealer works wonders on making it temporarily go away.Tip: I like to use a foundation brush to put on my liquid concealer. Not the same brush that I use for my powder concealer of course. But putting it on with a brush is better looking not to mention you don't get the oils from your fingers on your face that cause MORE ZITS!
31. bareMinerals Fair Matte SPF 15 Foundation
The Fair is the one on top. See the difference? The one on bottom is way more yellow. I was kind of skeptical about the Matte part of this foundation. I like to have a little bit of sparkle to my cheeks. Once I actually started using it I fell in love with it. The coverage is a little better than the Original Foundation. I like to use the Full Flawless Bush with this because it goes on so much smoother for all over coverage. For the smaller areas I like to use the Sephora Airbrush Concealer Brush.
Tip: Just like the other bareMinerals powder foundation, make sure you try all their different colors before you settle on just one. Also, start off with a small amount of powder in the lid of your container and swirl your brush into the product. Tap your brush on the side of the lid with the bristles over the lid to get off any excess powder then swirl the brush on your face wherever you are wanting coverage.
32. bareMinerals Healty Radiance Bronzer
You can kind of see the sparkle to it in the lid. 
I can't say enough good things about this bronzer. The only down side....they don't sell it individually. You have buy the Facial Wash and Lotion set to get this bronzer and I'm not sure that they sell the kit anymore. I'm really sad that that's the only way you can get this bronzer because I seriously love it. It has a little bit of sparkle to it so it gives you a little bit extra glow.
Tip: Use the bareMinerals Feather Light Brush when putting this bronzer on. You don't need a whole lot so the Feather Light is perfect for application. When applying, again, start off with a small amount of powder in the lid of your container and swirl your brush into the product. Tap your brush on the side of the lid with the bristles over the lid to get off any excess powder then swirl the brush on your face wherever you are wanting coverage.
33. Clinique In-A-Rush Blush #4

Tip: I would recommend using the brush included to get the blush from the lid to your face but I would suggest using a blush brush or the bareMinerals Flawless Face Brush to blend it into your cheeks.
34. Kat Von D Ludwig Pallette

Lucifer- black,
Orbi- dark olive green,
Dimebag- electric green,
Tequila- yellow,
Clay-light tan with gold sparkles,
Downtown- light sparkly gold/brown,
Baroque-darker shiny brown,
Leather-flat dark brown.
This is my one of my favorite pallettes of hers. The colors are just like what I use on a daily basis.
Tip: Blend, blend, blend. The best way to make your eye makeup look good is to make sure you blend your colors. Pick colors that you like, not what match your clothes. Most of all, have fun when you're putting on your makeup. It makes you feel better as the end result.
35. Kat Von D True Love Pallette

Peanut- light gold
Benji (cream)- gold
Rebekah- brown with gold glitter
Lucifer- black
Cholita- dark plum
Skiba- medium purple with silver glitter
Babe- iridescent purple
Missy- white with iridescent purple
This was the first pallette that I got that made me really have to think outside of my comfort zone to apply them.
Tip: Practice putting on makeup as much as you can. Keep trying to do different things and see what works and what doesn't work. Also, invest in some cotton cloths and eye makeup remover because you'll need it.
36. Kat Von D Truth Pallette

Sugar Skull- white with iridescent green
Long Distance-metallic green with gold sparkles
Snake Eyes- light green
Finland (cream)- teal cream
Prague- dark purple
Galeano- sparkly purple
Rehab- metallic pink
Sister- light pink
I like using the purple colors in this pallette. They blend really smooth and they look really great together.
Tip: Don't be a chicken like me, bust into that green color and rock it!
37. Beauty Control Havana Nights Eye Shadow Duo

This little duo is great for if you don't want to go all out with your makeup. I like to use it as just a little extra color on my eyelids for when I don't want to put a bunch of time or effort into my makeup. I like these colors because they are great for allover color.
Tip: use a foam tip eyeshadow brush to apply and then use a smudge brush to blend around the edges.
38. bareMinerals High Shine Eye Color color: Moonshine
I love this makeup! It's perfect for, as the name says, high shine eye color. I like to use this purple color with some of the colors from the Kat Von D Pallettes. I like to use is at the corner of my eye right below my crease. The high shine blended with the darker purples makes for a really pretty color. Tip: Use the foam brush that is attached to the lid to apply it on your eyelid, then use a eyeshadow brush to blend it in with the surrounding eyeshadow.

39. bareMinerals High Shine Eye Color color: Frost
I loving this silver with dark gray and black shades. It makes a really pretty smoky eye color. The silver goes great with purples and blues to make a really dramatic look too. This is such a great all around color to use with pretty much anything. If you're looking for a good silver to use go for this color.Tip: Just like the Moonshine color apply with the the foam brush that is attached to the lid to apply it on your eyelid, then use a eyeshadow brush to blend it in with the surrounding eyeshadow.
40. bareMinerals Glimmer Grace Eyeshadow

Tip: Use a very loose brush when applying the powder makeup. Also put some extra foundation under your eyes so if you drop any below your eye it easily wipes off.
41. bareMinerals True Gold Eye Color

I love this color! I like to use this color in the middle of my eye between a really dark color on the outside of my eye and a really light color on the inside of my eye. It's a great blending color because it's so sparkly you can get some over either side and it looks sparkly and nice.
Tip: I like to apply this with my Mary Kay Eye Definer & Eye Crease Brush the bristles of the brush are light and loose so you can apply it easy and blend really well too.
42. bareMinerals Pussycat Eye Color

Tip: Like the other bareMinerals eye colors. I like to use the Mary Kay brush to apply it. I use the crease side to use it on the crease of my eye. It is a great way to give your eye some depth.
43. bareMinerals Desert Bronze Eye Color
To be honest I can't remember the last time I used this color. haha. I like it because it's a dark gold. I guess I always forget about it so I don't use it as often. It would be good to use on for a crease color or an all over color because it isn't too dark.Tip: Use the Mary Kay brush and go for it!
New Blog Feature!
Hey guys. I'm still working on the make-up post. It's a LONG post. In the mean time I added an awesome new feature to my blog that you might enjoy. If you notice at the end of this post there is a "You Might Also Like" bar with past posts that you well...might also like. Haha.
Enjoy the new feature and tell me what you think.
Happy Wednesday!
Enjoy the new feature and tell me what you think.
Happy Wednesday!
Monday, October 17, 2011
Celebrating Baby Jackson
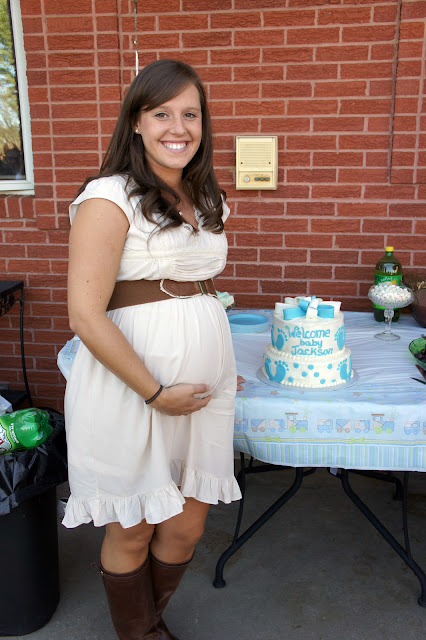
Derek's cousin Ashley Hoskins is expecting a little bundle of joy in December so to celebrate him we (my sister in laws Stephanie and Ashley) had a baby shower for here this past weekend. Her and her husband live in Tennessee so we don't get to see her very often but when we do we always enjoy getting to spend time with her.
She is seriously the most beautiful pregnant woman I have seen in quite some time. She makes pregnancy look so good. The shower was so much fun and it was so nice getting to spend the day in such beautiful weather.
Enjoy!

 The Belly of Honor: Ashley and her mom Cindy.
 All the yummy food!
 Stephanie's friend Alexis made this cake. It was SO yummy!
My nephew Payne.


 The party goers sun bathing in the wonderful weather that we had.

 Stephanie!

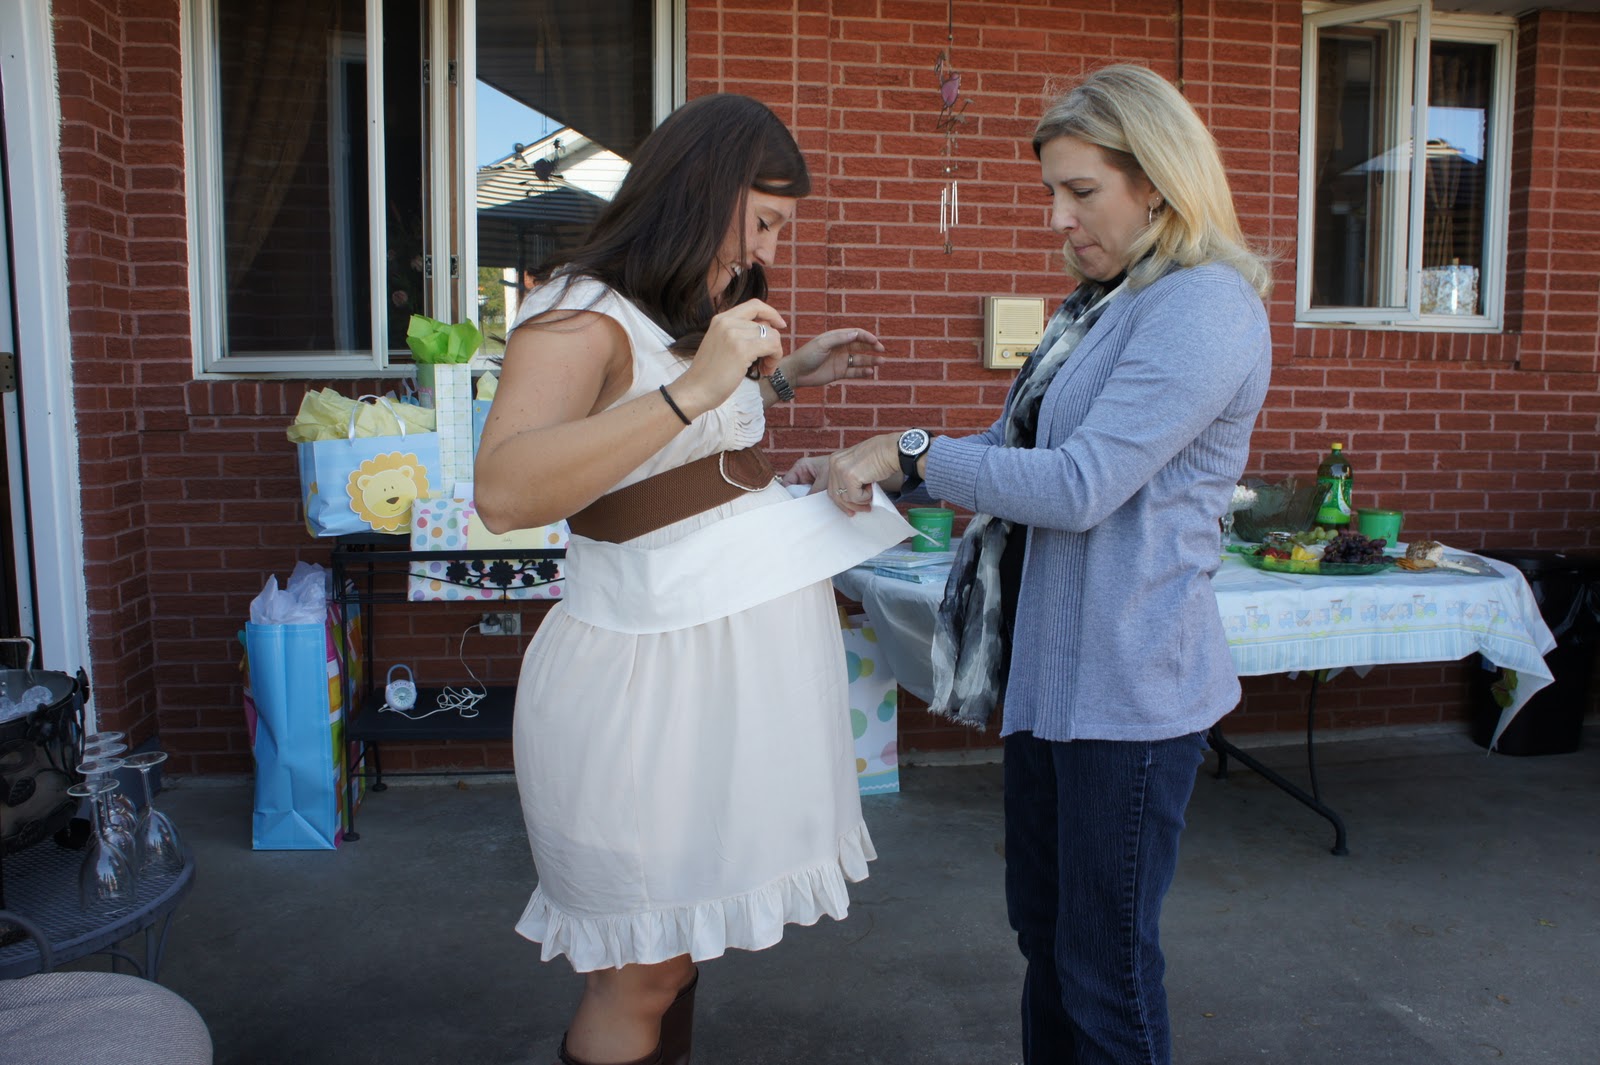
 Mrs Bonnie measuring our her toilet paper for the game.

 Ashley and Mona playing the TP game

 Ashley's Grandma Lynch and Ashley


 Ashley and her momma. She got it almost dead on. She was 1/2 of a square over.
 She definitely knows her grandbaby belly
 Showing off her victory.

 Mrs Bonnie measuring her TP
 She was off by a lot haha.
 Judy measuring up her belly.
 Cristy taking a turn.


 Ashley's cousin Lindsey taking her turn.


 Grandma Cindy and her baby measuring won the game.
 Me and Derek's Aunt Cindy.

 Me, Ashley and Stephanie
 Payne again.

 Cobie was so sleepy.
 Gift opening now


 A rattle and spoon for baby Jackson
 and a matching cup


Cindy was so proud of the burp cloth that she made. It's really cute. I love owls.

 Four generations.


 Ashley with Grandma Mona

 Aunt Cindy and Ashley


 I made her hold her dress so we could see the beautiful belly.
 Mrs Bonnie and Grandma Mona.
 Lindsey and Ashley

 Ashley, Steph, Ashley and Me
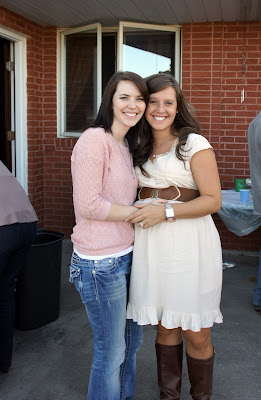
 Me and Ashely. I wish we lived closer together so we could see each other more.

She is seriously the most beautiful pregnant woman I have seen in quite some time. She makes pregnancy look so good. The shower was so much fun and it was so nice getting to spend the day in such beautiful weather.
Enjoy!


My nephew Payne.


More party goers enjoying the company and good weather.


and a bear piggy bank

Cindy was so proud of the burp cloth that she made. It's really cute. I love owls.


Another shot of the beautiful cake.


Subscribe to:
Posts (Atom)